
















Equipment List
AIARE Avalanche Level 1 and Rescue Equipment List
Below is a complete list of all the equipment required for this course. Most items are clickable and will take you directly to our Equipment Shop Page, where you can view equipment that meets the course requirements. You may purchase items in advance, buy them on the day of the course, or rent them if rentals are available.
Read everything here carefully.
This list represents a “worst-case scenario” for trips with significant weather. Some items may not be needed if conditions are mild, but it’s best to plan for the worst.
Check the forecast before your course to ensure proper preparation: NOAA Mt. Baker-Snoqualmie National Forest Weekly Forecast.
Rentals
Equipment available for rent through the AAI Equipment Shop is designated as “available for rent”.
These items must be rented before the first field day.
Click each underlined heading to see examples and make online purchases of guide-approved gear from the Equipment Shop.
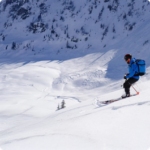
Clothing
-HEADWEAR-
- Beanie/Toque
- Wool or synthetic. Must fit under a helmet. Easily replaced with hooded layers after the early season.
- Sun Hat
- Ideally fits under a helmet. Ball caps with a button on top are NOT recommended. Visors or athletic hats are more comfortable, vent better, and are easier to clean and dry out.
- Buff / Neck Gaiter
- UPF-rated is highly recommended. Lighter colors are better for warm conditions and darker for colder conditions.
- Sunglasses or Glacier Glasses
- These are mandatory. If using glacier glasses, look for lenses that are CAT4 rated and have side shields. Photochromic are more expensive, but usable in a wider range of light.
- Ski Goggles
- For use in high winds and heavy snow and skiing downhill. These should be lightly tinted or photochromic.
- Helmet
- A ski or snowboard helmet is necessary for the course if you are skiing or snowboarding. Preferably a helmet with MIPS. Ensure that your helmet fits as this is critical for safety and comfort.
–GLOVES–
- Liner Gloves
- Thin, lightweight, wool or synthetic gloves. Size to fit snug but not too tight. Phone-compatible fingertips and palm texture are nice to have. These could be worn alone in temps greater than 25°F when it is dry. UPF rated are ideal.
- Hardshell Gloves
- Waterproof and insulated. If the glove lacks insulation, size it to fit a liner glove inside. Mainly used in wet conditions, cold temps, or when not moving.
-BASELAYERS-
- Undergarments
- Wool or synthetic. Long, compression-style undergarments can help reduce inner thigh chafing. Sports bras without shoulder buckles or clasps are more comfortable under a pack.
- Base Top
- A lightweight, wool or synthetic sun hoody is ideal. UPF 30+ sun protection is best. UPF clothing works better than sunscreen.
- Base Layer Pants
- Wool or synthetic. Typically thin. Bring 1 for the early or late season. Optional for mid-season (depending on weather).
-MIDLAYERS-
- Active Insulation Top
- Lightweight “gridded fleece” or lightweight synthetic insulated jacket or pullover. Hood preferred. Active insulation weight – 40g/m2. Heavier insulation weight – 60-80g/m2. Alpha fleece works as well.
- Softshell Pants
- Thin, weather-resistant, breathable, and stretchy. You will wear these a majority of the time.
- Softshell Jacket
- A soft shell jacket is considered an “action layer.” Its materials are designed to stretch and breathe while also maintaining wind and water resistance. This allows the user to leave this jacket on for a wide range of temps and conditions throughout the day without the hassle of constantly changing layers. Windproof jackets are lightweight and packable but lack the breathability and stretchy nature of the soft shell. Windproof jackets are ideal for blocking wind and light precipitation during low-output activities.
-INSULATING LAYERS-
- Insulation Jacket
- AKA the “puffy”. Down or synthetic. This piece is worn in cold conditions or when not moving. Hood preferred. If choosing down, water-resistant down treatment is preferred to help prevent matting and loss of insulating ability if the jacket gets wet.
-HARDSHELLS-
- Hardshell Jacket (Available to rent)
- Non-insulated jacket with a waterproof and breathable membrane. Three-layer construction is recommended. It must have a hood, ideally helmet-compatible. When sizing, make sure it can fit over other layers. Not insulated.
- Hard Shell Pants (Available to rent)
- Non-insulated, waterproof, and breathable membrane. Full side zips are recommended. Ideally has at least 1/4 length zipper from the bottom of the pant cuff in order to get pants on and off while wearing mountain boots. When sizing make sure it is able to fit over a base layer and soft shell pants. Insulated ski pants are strongly discouraged due to lack of waterproofness and heavy insulation.
- Note: If you are wearing ski/snowboard pants, then that layer should suffice; consider adding a base layer for additional warmth. However, if you do not have ski-specific pants, then you will want to stick to the base layer, soft shell layer and hard shell layer combination. Please feel free to reach out to the AAI Equipment shop with any further questions.
-FOOTWEAR-
- Socks
- Wool or synthetic socks that are over the ankle height. If you are skiing then socks that are just below the knee, or go above the edge of your ski boot are recommended. Having two pairs on hand for the field days are also recommended in case a pair gets wet.
- Ski Boots (Available to Rent)
- We strongly encourage the use of randonee (AKA AT or alpine touring) equipment. If you are an experienced telemark skier, modern telemark gear will also be accepted. Make sure your boots fit you snug enough for downhill performance, but are comfortable enough to keep your toes warm. The hinge should be flexible enough to allow for comfortable walking, even for long distances. They must be equipped with a deep rubber lugged sole.
- Snowboard Boots
- For use with your splitboard.
- Snow Boots
- Make sure they are warm, waterproof and comfortable to walk in.
- Gaiters (Snowshoers only) (Available to rent)
- Knee or calf height. Best used in early season conditions. Optional for mid and late season. Gaiters do help protect pants from crampon holes regardless of the season.
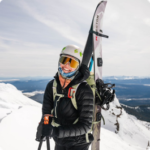
Backcountry Equipment
We require some form of “flotation”. This can either be skis, splitboard, or snowshoes. Make sure that you have the appropriate boots for whichever method you choose.
- Skis/Splitboard (Available to Rent)
- Skis with a backcountry flex (softer) are preferable to skis designed for hard-packed lift-serviced skiing. You may choose to bring either telemark skis or alpine touring skis. Telemark skis must be equipped with full metal edges. If you use a cable binding, bring a spare cable. Equip your skis with runaway straps. Alpine touring skis should use bindings that allow for forward and lateral release.
- Poles (Available to Rent)
- Adjustable poles with a full-size snow basket are recommended. Ski/Probe poles are not a substitute for the avalanche probe.
- Skins (Available to Rent)
- For the PNW, skins with more traction are recommended over skins with more glide.
- Snowshoes (Available to Rent)
- If not using skis or splitboard, bring snowshoes. They should be equipped with an integral crampon and/or aggressive traction on the bottom of the snowshoe.
- Avalanche Probe (Available to Rent)
- A 230cm length is the minimum. If you are in the Cascades with an especially deep snowpack then a 320cm probe is recommended. Carbon fiber is lighter and suffers less deflection than aluminum models. Look for a model that has graduated depth markings for use during snow pit studies.
- Avalanche Transceiver (Available for Rent)
- Your transceiver MUST be a modern, 3-antenna, single frequency (457kHz) transceiver. If your beacon is older than 5 years, you should consider retiring it or returning it to the manufacturer to have it tested for function and frequency drift. Older 2-antenna transceivers are obsolete.
- Avalanche Shovel (Available to Rent)
- We require metal (aluminum) shovels. Newer models are lighter, stronger, more packable, and more ergonomic than older ones. Avalanche shovels now have a UIAA rating, so keep that in mind when shopping. Additionally, we recommend a mid-sized blade that can fit in your pack. Smaller blades don’t move enough snow, and larger blades move too much snow where efficiency is lost. A shovel that has a hoe-mode and snow profile-friendly blades are also a bonus.
- Day Pack/Ski Pack
- A 25L to 35L pack is an ideal size. Whatever you need to use for a full day out. For a ski-specific pack, your pack should fit well, move with you, and not be a major hindrance when downhill skiing. Choose a model with ice axe loops and straps to carry your skis easily. Some models feature additional avalanche features such as an “Avalung” or airbags.
- Hydration
- Have 2-3 L of water capacity. Two or three water bottles, usually one-liter wide mouth Nalgene type, are required. Narrow mouth bottles are not funcitonal and should not be used. Other similar plastic bottles can also work. Hydration packs are NOT recommended as the tubes can freeze and stay frozen for the duration of the field day.
- Water Bottle Parkas
- These are insulating jackets for your water bottles, one for each bottle. Should cover the entire bottle, including the lid. Having an insulated water bottle takes place of this.
Other Essentials
- Suncreen
- At least an SPF of 30+, zinc-based is preferred. Small travel-size tubes are recommended so you can put them in a close-by pocket for easy access.
- Lip Balm
- Make sure it is SPF-rated.
- Pee Cloth (Optional)
- A reusable, antimicrobial pee cloth, used in place of toilet paper or wet wipes. Note that everything is pack-it-in/pack-it-out for Leave No Trace purposes. If toilet paper is used, it will have to be packed out. This also helps keep pack weight down.
- Urination Device (Optional)
- Pee funnels such as the GoGirl or Freshette.
- Menstrual Cup (Optional)
- As with toilet paper, everything in the backcountry must be packed out. Menstrual cups can help with waste needing to be packed out.
- Personal First Aid Kit
- Band aids
- Blister Treatment
- Prescription Drugs
- Ibuprofen, etc
- If you wear contacts, make sure you have spares if you can’t see without them
- Repair Kit
- Ski straps (voile style)
- Duct tape (can be wrapped around a trekking pole or a water bottle. Gorilla Tape tends to be the best brand for the mountains).
- Zip ties
- Extra pole baskets
- Multi-tool to repair bindings etc
- Binding-specific screws
- 2 trash bags that are big enough to line the inside of your pack with
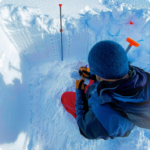
Optional Items
These items are not required, although many are nice “luxury” items that can make your expedition more enjoyable. Remember that a few ounces here and there add up to extra pounds on your back and knees during your expedition.
- Navigation App
- Optional smartphone app such as CalTopo, Gaia, OnX, etc. Please have maps of the area downloaded.
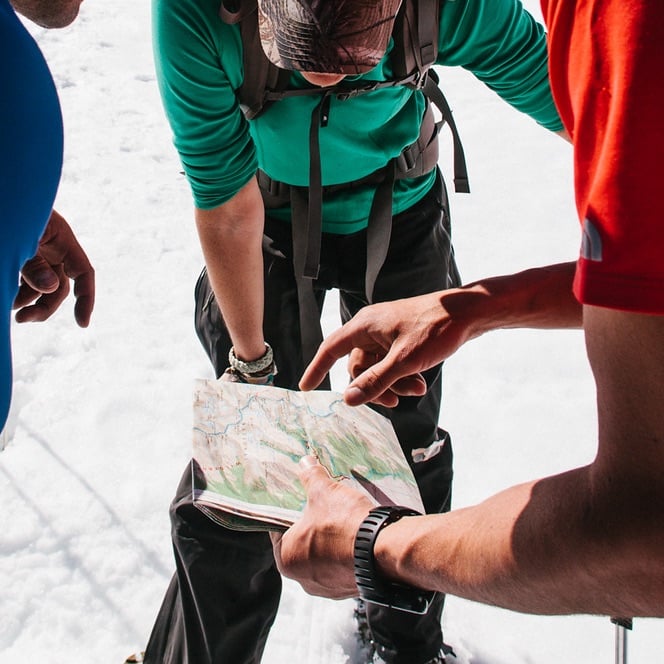
- Map and Compass
- Map should be of Mt. Baker Area (Preferably Green Trails Maps #13SX). The compass must have a declination adjustment.
- Altimeter Watch
- If you have one then bring it. It is a great tool to have in the backcountry, especially for navigation.
- Hand/Foot Warmers
- Recommended for people that are susceptible to cold hands and toes. These should be small, disposable type products.
- Ski/Board Crampons
- Most useful for March courses. These come in a variety of widths; be sure yours are wide enough to fit the width of your skis.
- Small Foam Pad
- Can be useful for sitting or kneeling during field instruction. Your pack can also serve this purpose.